Categories
Posts

Thematic and Grid Systems

So you are wanting to add a grid system to the Thematic Theme Framework for WordPress. Grid systems make theme development super easy right? Not necessarily.

Occasionally a question will pop up on the forum involving incorporating a gird into Thematic. Most of the questions involve adding classes like grid_6, span-5 to the HTML Thematic outputs to add the styling for their framework of choice. You can do that by adding functions and filters to your functions.php file, but this is the wrong way to do it and causes a lot of code bloat.

Grids are suppose to make things easy, once you step into the realm of having to add classes to the existing markup to match whatever syntax the grid system is using, you are already making things harder than they need to be.

zen-grids-example

View Demo

This example is going to be a little complicated for some and super easy for others already familiar with Sass and Compass. If you don’t know what Sass and Compass are, watch this first for a little bit of a background. This post isn’t really a tutorial, but more of a visualization of how easy it can be to work with a grid system in Thematic. You will obviously need Sass and Compass for this to work.

The code is specifically set up for using the Responsive Base Theme I have created for Thematic and the grid system style I will be aiming for is the default Thematic layout.

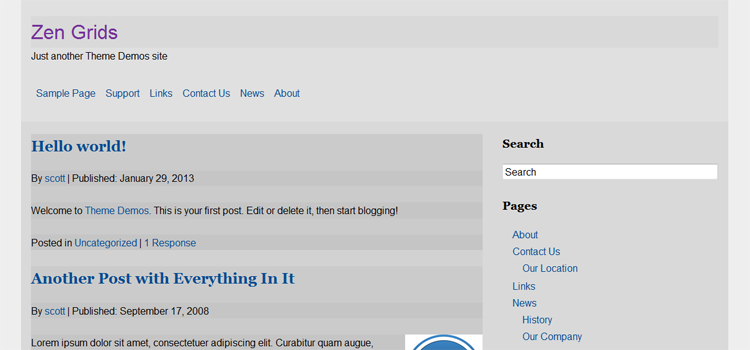
Zen Grids and Thematic

Zen Grids is a responsive grid system built to work with Sass and Compass, in my opinion it is one of the easier ones out there to understand. You will have to most likely visit the Zen Grids site and follow the simple setup tutorials, once setup though, it is a breeze.

The first thing we need to do is import Zen Grids in the top of the style.scss file. If you are on PC and using Scout, there is no real setup, Zen Grids is built in, you need to change the import to just @import "zen";.


@import "zen-grids";

Next we need to set a couple Sass variables so the grid system knows how many columns we are using and the width of the gutters.


$zen-column-count: 12; // grid columns
$zen-gutter-width: 2em; // gutter width

Since the responsive base theme I have created is a “mobile-first” structure, all the base CSS is already set and only things that need to be changed are in the media queries. So we need to swap out the previous media queries at the bottom of the style.scss file with the new Zen Grids setup.


@media only screen and (min-width: 45em) {
    #wrapper {
        @include zen-grid-container;
        max-width: 1140px;
        margin: 0 auto;
    }
    #branding {
        @include zen-grid-item(12, 1);
        width: 100%;
    }
    #access .menu {
        @include zen-grid-item(12, 1);
        @include zen-clear(both);
        width: 100%;
    }
    #container { @include zen-grid-item(8, 1); }
    #main {
        @include pie-clearfix;
        width: 100%;
    }
    .main-aside { @include zen-grid-item(4, 1, right); }
    #secondary { @include zen-clear(right); }
    #subsidiary {
        @include pie-clearfix;
        width: 100%;
    }
    #first { @include zen-grid-item(4, 1); }
    #second { @include zen-grid-item(4, 5); }
    #third { @include zen-grid-item(4, 9); }
    #footer-widget { @include zen-grid-item(12, 1); }
    #siteinfo {
        @include zen-grid-item(12, 1);
        width: 100%;
    }
    blockquote {
        &.left {
            float: left;
            width: 33%;
            margin-left: 0;
            margin-right: 1.5em;
            text-align: right;
        }
        &.right {
            float: right;
            width: 33%;
            margin-left: 1.5em;
            margin-right: 0;
            text-align: left;
        }
    }
    .sf-menu li { float: left; }
    .content-column {
        float: left;
        width: 45%;
        margin: 0 0 1.625em;
    }
    .navigation {
        margin: 0 0 1.625em;
        overflow: hidden;
    }
    .nav-previous {
        float: left;
        width: 50%;
    }
    .nav-next {
        float: right;
        width: 50%;
        text-align: right;
    }
    .page-template-template-page-fullwidth-php #comments { @include zen-grid-flow-item( 8, 12); }
}

That is it, there is a little bit of extra markup in there for additional elements, but only because I wanted to recreate the exact same layout as the Responsive Base theme, but with the added benefit of Zen Grids.

If you need help understanding the code, I would recommend checking the Zen Grids help page which is well documented.

This is by no means the “optimized” way to add Zen Grids, there a a few things that can be done to cut the code down a bit and make things “DRY“, but the idea is to see a simple example of the power Sass and Compass can add to your projects. Keep in mind that a grid system is not always required, but if you are creating sites over and over it may be beneficial to your workflow.

With all that said, personally I have dropped playing with Zen Grids and focused my attention on another grid system that seems to be the best I have found so far, it is called Susy and if you are going to go the grid route, I highly suggest looking into it.

Update: This site is now built using Susy Grids, so far they are awesome.

Categories
Posts

Thematic and Icon Fonts

There are plenty of tutorials and oodles of information floating around about icon fonts, they are all the rage right now. There are awesome things achievable with icon fonts and they can provide a lot of flexibility in your development workflow. It seems some people get the impression that using fonts as icons is overly complicated, so my goal is to provide a few simple examples of using icon fonts with the Thematic Theme Framework for WordPress.

I am going to show you how to use fonts for icons the easiest way possible, then explain a even better way afterwards, but currently the goal is just to get you setup using icon fonts with your Thematic child themes. We are going to be using a handy little API from We Love Icon Fonts.

We Love Icon Fonts with WordPress

We are going to be using the Entypo set of icons for now, but you can swap these out later for a different set. The We Love Icon Fonts sites example uses an @import, while easier, I usually avoid using @import in stylehseets for performance reasons. So lets load that instead in the header as is best practice with any stylesheets when using WordPress.

Enqueue Icon Fonts Styles

This snippet will register and enqueue the weloveiconfonts.com API styes for use in the theme, this will work for any WordPress theme, not just Thematic. Just drop this into the functions.php of your child theme, or theme if you aren’t using a child.


// enqueue font icons
function childtheme_icon_fonts() {
    // registers weloveiconfonts.com icon font api styles
    wp_register_style('icon-fonts-css', 'http://weloveiconfonts.com/api/?family=entypo');
    // enqueue the scripts for use in theme
    wp_enqueue_style ('icon-fonts-css');
}
add_action('wp_enqueue_scripts', 'childtheme_icon_fonts');

Required CSS to call Icon Fonts

Just drop this CSS in your style sheet.


[class*="entypo-"]:before { font-family: 'entypo', sans-serif; }

That’s it. Now all that is needed is to add a specific class with a name on the element to call the icon, for example .icon-home.

The CSS included in the demos is very basic, they are styled with just enough structure to get you started on making them your own. The demos were set up in Sass, so if you prefer that you can grab it off the SCSS section tab in the demo.

Social Icon Font Example

Check out this Pen!

One of the most popular uses is social icons, sure you can use images, but icon fonts are cooler. This is a basic setup using Thematic’s existing structure for providing a few links to your social networks in the sidebar. :)

Social Icon Font PHP

This snippet will go in the functions.php of the child theme. We are using some existing CSS classes to keep the same structure from Thematic to keep things uniform in the sidebar, hooking the function on to the thematic_belowmainasides hook.


function childtheme_social_icon_fonts() { ?>
    <div id="tertiary" class="aside main-aside">
        <ul class="xoxo social-icons">
          <li><a class="entypo-twitter" href="#" title="Twitter"><span>Twitter</span></a></li>
          <li><a class="entypo-facebook" href="#" title="Facebook"><span>Facebook</span></a></li>
          <li><a class="entypo-github" href="#" title="Github"><span>Github</span></a></li>
          <li><a class="entypo-rss" href="#" title="RSS"><span>RSS</span></a></li>
        </ul>
    </div>
<?php }
add_action('thematic_belowmainasides', 'childtheme_social_icon_fonts');

Social Icon Font CSS


#tertiary { clear: right; }
.social-icons { list-style: none; }
.social-icons li { float: left; }
.social-icons li a {
    padding: 0 0.5em;
    font-size: 2em;
    text-decoration: none;
    text-shadow: 
        1px 1px 0 rgba(0, 0, 0, 0.4), 
        1px 1px 2px rgba(0, 0, 0, 0.4);
}
.social-icons li a:hover {
    text-shadow: 
        1px 1px 0 rgba(0, 0, 0, 0.6), 
        1px 1px 4px rgba(0, 0, 0, 0.4);
}
.social-icons span { display: none; }

This example uses Twitter, Facebook, Github and RSS, the actual text will be hidden, using the icons only, but it is good practice to include it anyway.

WordPress Menu Font Icons

Check out this Pen!

Inserting font icons in the WordPress menu is pretty easy, the way to do it is to add a class through the WordPress Admin built in Custom Menu functionality. There is a section “CSS Classes” where you can add the icon class you want, if you don’t see this option in the menus, check the “Screen Options” in the right top and check that option to show. Since the classes are added through WP itself, there is no additional PHP needed.

WordPress Menu Font Icons CSS


.sf-menu [class*="entypo-"]:before {
    z-index: 3;
    position: absolute;
    top: 5px;
    left: 5px;
    font-size: 24px;
    color: #666666;
    text-shadow: 
        1px 1px 0 rgba(0, 0, 0, 0.4), 
        1px 1px 2px rgba(0, 0, 0, 0.4);
    cursor: pointer;
}
.sf-menu [class*="entypo-"]:hover:before {
    color: #FF4B33;
    text-shadow: 
        1px 1px 0 rgba(0, 0, 0, 0.6), 
        1px 1px 4px rgba(0, 0, 0, 0.4);
}
.sf-menu [class*="entypo-"] a { padding: 9px 13px 9px 38px; }
.sf-menu [class*="entypo-"] li a { padding: 9px 13px; }

Just don’t forget you need to add the classes through the WP Admin Menu.

Navigational Font Icons

Check out this Pen!

Thematic by default has two separate navigation structures, one is for navigating the Older/Newer posts and the other is on single post pages that show the title of the previous and next post. Most sites I work on do not include the navigation on the single posts. This example removes the single post page navigation and instead replaces the standard Older/Newer navigation in WordPress with some font icons to replace the default text.

Navigational Font Icons PHP

The first function completely removes the upper navigation (personal preference), instead we are only going to be using the lower navigation. The second function removes the navigation on single pages and changes the structure to give some better hooks for adding some font icons arrows instead. I also added a title in since there is no text, at least the title “Older posts” or “Newer posts” will show on hover, which is helpful.


// override nav_below functionality - remove it completely
function childtheme_override_nav_above() {
    // silence
}

// override nav_below functionality
function childtheme_override_nav_below() {
    if ( !is_single() ) { ?>
        <div id="nav-below" class="navigation">
            <div class="nav-previous"><?php next_posts_link('<i title="Older posts" class="entypo-left"></i> <span>Older posts</span>') ?></div>
            <div class="nav-next"><?php previous_posts_link('<span>Newer posts</span> <i title="Newer posts" class="entypo-right"></i>') ?></div>
        </div> <?php
    }
}

Navigational Font Icons CSS


.navigation {
    margin: 0 0 1.625em;
    overflow: hidden;
}
.navigation a {
    display: block;
    height: 5em;
    width: 5em;
    line-height: 5em;
    text-align: center;
    background: rgba(0, 0, 0, 0.2);
    border-radius: 50%;
}
.navigation i {
    font-size: 5em;
    color: #666666;
    font-style: normal;
}
.navigation .nav-previous {
    float: left;
    width: auto;
}
.navigation .nav-next {
    float: right;
    width: auto;
}
.navigation span { display: none; }

Now the kicker.

While this is a viable way to achieve font icons and is usable, there is a better way to do this if you are trying to keep everything optimized (as fast as possible). The idea is instead of letting We Love Icon Fonts handle the loading of the fonts, you instead use a service to trim down the fonts to exactly what you need, so you load 4 icons in the font instead of 40 and handle the serving of the font files yourself. There are some great services out there like IcoMoon and Fontello which make it a breeze. So hopefully this gives you a leg up on using font icons with Thematic.

A few complex examples.

Categories
Posts

Titanic, a child theme for Thematic

The Titanic child theme is my last real attempt at creating a full fledged theme for the Thematic Theme Framework. This is the responsive child theme my site is currently built on, so technically you are looking at the demo right now. This is yet another theme built on my own Responsive Base which is a starter child theme for Thematic aimed at speeding up development times.

Titanic Responsive Theme Example Image

Demo Titanic Theme

Download Titanic Theme

Titanic Highlights

This responsive theme is packed with best practices involving developing child themes for Thematic I have picked up in the past few years. The one thing that makes this theme stand out is the way the menu works, it uses a footer anchor approach which is not currently set up for drop downs.

The theme is also built on Sass and Compass which hopefully you are using as it will make developing sites quicker, even if you just use it for the ability to import and compile.

While creating this theme, I made my best effort to make it compatible with the new Thematic HTML5 Plugin created by Karin Taliga. This plugin is awesome for converting some existing elements in Thematic to HTML5 without losing any functionality. For anyone that has looked into this (me), it is a pain to do and she has done an amazing job.

If you want to know every detail about this theme, you will probably want to review the information on my Responsive Base theme since they share all the same features.

Categories
Posts

Child’s Play, child theme for Thematic

Child’s Play is a child theme for the Thematic Theme Framework, it is built with the mobile-first approach to responsive web design, but with a few unique features. It was originally created as a stress test for the Responsive Base to find more improvements and make sure I wasn’t forgetting anything obvious. After adding new functionality and some styling to make it a little more visually impressive, the Child’s Play child theme was born.

Child's Play Responsive Theme Image

Demo Child’s Play Theme

Download Child’s Play

This project is on Github, so feel free to contribute!

Child’s Play Highlights

While this child theme shares all the same benefits as the Responsive Base child theme, I won’t be repeating them here. Child’s Play is unique in that it is the only child theme (I know of) available for Thematic which has the benefit of using Sass and Compass. Child’s Play turned out to be a good alternative to Responsive Base for those who want even a more refined starting point for child theme development. Although if you were coding a site from a PSD, Responsive Base would probably be a better start.

The CSS

Child’s Play takes it up a notch adding presentational styles and utilizing some very handy features that using Sass and Compass provide. I can’t really dive into all the things that make Sass and Compass great, that is already heavily documented and there is no way I could ever do it justice. All I can say is from now on, I will always be using Sass and Compass for my future projects, I think you should too.

The Functions PHP

Probably a little over the top, the functions.php clocks in at a little over 500 lines of code. I ended up reworking a bunch of things and adding more options to be reused in other various projects.

  • Added WooThemes Flexslider which works off of sticky posts, it is currently set up to show featured images of 750px wide by 425px height, which can easily be changed. You just have to settle on a specific size and make sure they are saved as the same size when using this option. If you have no sticky posts, the slider just won’t show, and best of all, the slider assets won’t load.
  • I also went ahead and added a header aside widget, I use this a lot for addresses, search bars, or even social icons, which comes in handy.
  • Added a heavily modified version of FlexNav, a jQuery menu that is collapsed on mobile devices to provide more room for content, currently the menu doesn’t support drop downs now supports drop downs.
  • Modified the postheader and postfooter to offer a different style, keeping the content on top.

Last Thoughts

Again, check the Responsive Base starter theme for more information on all the features packed into this child theme, Child’s Play just takes it a step further. This theme may be a little advanced for someone just getting started with Thematic, but if you already use Thematic for all your child theming, I think you will love this setup. A lot of the work on this theme comes from a big push from myself to optimize my workflow and stay up on the latest best practices.

Update: Now made to comply to with Idiomatic-CSS guidelines.

Update: Now works with the Thematic HTML5 Plugin by Karin at invistruct.com.

Categories
Posts

Responsive Base, a child theme for Thematic

Update: Thematic 2.0 is now in beta and available on Github, which makes this theme outdated. You can still use it since Thematic is backwards compatible, but if you want to be up to date, use Thematic 2.0 from Github and Responsive Base Plus.

Responsive Base is a child theme built on the mobile-first approach to responsive web design. It was created not to just be responsive, but to act as a template or starting point for child theme development for the Thematic Theme Framework.

After creating quite a few Thematic based sites, I felt I needed a solid base starting point which saves a little time by being already set up with some very useful modifications I frequently use.

Responsive Base is ideal for me, I created it for me. Although others working with responsive themes for Thematic will find it useful and refreshing. It is intended to work best with the latest version of Thematic, but works fine on 9.7.7 and above.

Responsive Base Theme Image

Demo Responsive Base Theme

Download Responsive Base Theme

View the demo to take a peek, or visit GitHub to download or view the code. Special thanks to Kathy for inspiration from her adaptive layouts for Thematic.

Responsive Base Highlights

The CSS

Thematic has a great minimalistic style by default, but I prefer not to have those default styles at the start of every child theme.

  • The reset.css has been replaced by normalize.css which preserves the browser defaults and also corrects common browser inconsistencies.
  • Original style sheets have had a ton of the unnecessary styles removed and condensed, while also building everything with a mobile first approach to responsive web design.
  • Added HTML5Boilerplate print styles for clean printing and HTML5Boilerplate helper classes to take advantage of the latest best practices for things like clear fixes and image replacement.

The Functions PHP

  • Adds my snippet to add conditional classes for Thematic to the header to target old versions of IE. This also now adds the meta viewport for correct scaling on mobile devices. By default this responsive theme will display a static mobile version with a little CSS for IE7 and IE8 based on a post by Joni Korpi called leaving old IE behind.
  • Includes a few functions to clean up the head of the document of lines of code that are loaded by default.
  • Helps optimize script loading in WordPress by providing a template to promote good habits. Combining scripts, loading custom scripts in a custom.js file instead of on page and loading scripts in the footer unless they are required to load in the header.
  • Loads Modernizr which includes the html5shiv for getting IE to recognize new HTML5 elements, also Modernizr does a ton more, especially useful for providing CSS3 fallbacks. Responsive Base child theme comes bundled with the full version of Modernizr, you should however use the build script to only include what you need.
  • Loads FitVids JavaScript which handles the resizing of videos for responsive websites.
  • Also provides a bunch of handy functions I tend to use on most child theme builds. Such as PHP snippets to add a Favicon, register additional menus in WordPress, a fourth subsidiary widget (good for footer menus), optimized Google Analytics and also a snippet to hide widget locations in the admin area.

Responsive Base File Structure

Includes necessary folders and files already setup in the child theme to promote well structured themes.

  • /images/
  • /js/
    • custom.js
    • jquery.fitvids.js
    • modernizr.js
  • favicon.ico
  • functions.php
  • screenshot.png
  • style.css
  • style.scss (for Sass/Compass)

Last Thoughts

While this theme is intended for developers to dive right in to responsive design with Thematic, it would also help people who are new to child themes get an idea on how things can be done in a clean and efficient way. Getting started in mobile-first responsive design can be rough at first, so hopefully you find this child theme template useful and be sure to always get the latest version or fork your own from GitHub.

Feel free to post your creations with the Responsive Base child theme in the comments, or if you think of anything to add, shoot me a pull request on GitHub. :)

Update: Now made to comply to with Idiomatic-CSS guidelines and also added a style.scss file for a basic Sass structure which also follows the guidelines. If you don’t use Sass, delete the style.scss file.

Update: Now works with the Thematic HTML5 Plugin by Karin at invistruct.com.

Categories
Random

Disqus Comments and Thematic

The Disqus comment platform is a very popular plugin for WordPress, it just happens to work great with the Thematic theme framework. If you aren’t careful though, you may not notice that there is one sneaky problem.

Disqus Comments and Thematic

Thematic will still insert the #comments ID on two different sections postfooter_postcomments and postfooter_postconnect of your child theme, but the ID will no longer exists with the Disqus plugin installed. You will need to modify the php on both to change the ID in the link from #comments to #disqus_thread to provide a correct jump to location on the pages for people clicking on a link to leave comments.

Disqus is a great cheater way to install a nice looking comment system (with features) and not have to spend a ton of time styling the comments section, which can be a pain for a novice. So consider these two different snippet options for using Disqus on a Thematic child theme the ultimate cheat. Just insert one of the below methods in the functions.php of your child theme.

Thematic Option 1

This version removes the postfooter_postconnect completely, it isn’t really needed. With that gone, postfooter_postcomments just needs an override with the correct ID’s and done.


// override existing and kill the postconnect from single pages, unecessary baggage
function childtheme_override_postfooter() {
  global $id, $post;
  if ($post->post_type == 'page' && current_user_can('edit_posts')) { /* For logged-in "page" search results */
    $postfooter = '<div class="entry-utility">' . thematic_postfooter_posteditlink();
    $postfooter .= "</div><!-- .entry-utility -->\n";
  } elseif ($post->post_type == 'page') { /* For logged-out "page" search results */
    $postfooter = '';
  } else {
    if (is_single()) {
      $postfooter = '<div class="entry-utility">' . thematic_postfooter_postcategory() . thematic_postfooter_posttags();
    } else {
      $postfooter = '<div class="entry-utility">' . thematic_postfooter_postcategory() . thematic_postfooter_posttags() . thematic_postfooter_postcomments();
    }
    $postfooter .= "</div><!-- .entry-utility -->\n";
  }
  echo apply_filters( 'thematic_postfooter', $postfooter );
}

// override existing and change #comments to #disqus_thread to provide correct jump location.
function childtheme_override_postfooter_postcomments() {
  if (comments_open()) {
    $postcommentnumber = get_comments_number();
      if ($postcommentnumber > '1') {
      $postcomments = ' <span class="comments-link"><a href="' . apply_filters('the_permalink', get_permalink()) . '#disqus_thread" title="' . __('Comment on ', 'thematic') . the_title_attribute('echo=0') . '">';
      $postcomments .= get_comments_number() . __(' Comments', 'thematic') . '</a></span>';
      } elseif ($postcommentnumber == '1') {
      $postcomments = ' <span class="comments-link"><a href="' . apply_filters('the_permalink', get_permalink()) . '#disqus_thread" title="' . __('Comment on ', 'thematic') . the_title_attribute('echo=0') . '">';
      $postcomments .= get_comments_number() . __(' Comment', 'thematic') . '</a></span>';
      } elseif ($postcommentnumber == '0') {
      $postcomments = ' <span class="comments-link"><a href="' . apply_filters('the_permalink', get_permalink()) . '#disqus_thread" title="' . __('Comment on ', 'thematic') . the_title_attribute('echo=0') . '">';
      $postcomments .= __('Leave a comment', 'thematic') . '</a></span>';
      }
  } else {
    $postcomments = ' <span class="comments-link comments-closed-link">' . __('Comments closed', 'thematic') .'</span>';
  }
  // Display edit link
  if (current_user_can('edit_posts')) {
    $postcomments .= ' <span class="meta-sep meta-sep-edit">|</span> ' . thematic_postfooter_posteditlink();
  }
  return apply_filters('thematic_postfooter_postcomments',$postcomments);
}

Thematic Option 2

This version removes the postfooter_postconnect completely also, but the example also moves the author from the post header to the post footer along with fixing the ID. I am only including this one based on that the last 3 sites I have done all had no author, or had it moved below to the post footer.


// move author from postheader to postfooter, removed post edit also, appears in postfooter also.
function childtheme_override_postheader_postmeta() {
  $postmeta = '<div class="entry-meta">';
  $postmeta .= thematic_postmeta_entrydate();
  $postmeta .= "</div><!-- .entry-meta -->\n";

  return apply_filters('thematic_postheader_postmeta',$postmeta);

}

// add author into the footer entry-utility instead, also kill the post_connect
function childtheme_override_postfooter() {
  global $id, $post;
  if ($post->post_type == 'page' && current_user_can('edit_posts')) { /* For logged-in "page" search results */
    $postfooter = '<div class="entry-utility">' . thematic_postfooter_posteditlink();
    $postfooter .= "</div><!-- .entry-utility -->\n";
  } elseif ($post->post_type == 'page') { /* For logged-out "page" search results */
    $postfooter = '';
  } else {
    if (is_single()) {
      $postfooter = '<div class="entry-utility">' . thematic_postmeta_authorlink() . ' <span class="meta-sep meta-sep-author"> | </span>' . thematic_postfooter_postcategory() . thematic_postfooter_posttags();
    } else {
      $postfooter = '<div class="entry-utility">' . thematic_postmeta_authorlink() . ' <span class="meta-sep meta-sep-author"> | </span>' . thematic_postfooter_postcategory() . thematic_postfooter_posttags() . thematic_postfooter_postcomments();
    }
    $postfooter .= "</div><!-- .entry-utility -->\n";
  }
  echo apply_filters( 'thematic_postfooter', $postfooter );
}

// override existing and change #comments to #disqus_thread to provide correct jump location.
function childtheme_override_postfooter_postcomments() {
  if (comments_open()) {
    $postcommentnumber = get_comments_number();
      if ($postcommentnumber > '1') {
      $postcomments = ' <span class="comments-link"><a href="' . apply_filters('the_permalink', get_permalink()) . '#disqus_thread" title="' . __('Comment on ', 'thematic') . the_title_attribute('echo=0') . '">';
      $postcomments .= get_comments_number() . __(' Comments', 'thematic') . '</a></span>';
      } elseif ($postcommentnumber == '1') {
      $postcomments = ' <span class="comments-link"><a href="' . apply_filters('the_permalink', get_permalink()) . '#disqus_thread" title="' . __('Comment on ', 'thematic') . the_title_attribute('echo=0') . '">';
      $postcomments .= get_comments_number() . __(' Comment', 'thematic') . '</a></span>';
      } elseif ($postcommentnumber == '0') {
      $postcomments = ' <span class="comments-link"><a href="' . apply_filters('the_permalink', get_permalink()) . '#disqus_thread" title="' . __('Comment on ', 'thematic') . the_title_attribute('echo=0') . '">';
      $postcomments .= __('Leave a comment', 'thematic') . '</a></span>';
      }
  } else {
    $postcomments = ' <span class="comments-link comments-closed-link">' . __('Comments closed', 'thematic') .'</span>';
  }
  // Display edit link
  if (current_user_can('edit_posts')) {
    $postcomments .= ' <span class="meta-sep meta-sep-edit">|</span> ' . thematic_postfooter_posteditlink();
  }
  return apply_filters('thematic_postfooter_postcomments',$postcomments);
}